How to Boost Your Chevy Camaro SS: A Step-by-Step Guide to Installing a Performance Cold Air Intake
If you’re a Chevy Camaro SS enthusiast looking to enhance your car’s performance, one of the most effective and straightforward modifications you can make is installing a performance cold air intake. This guide will walk you through the process, providing you with all the information you need to make this upgrade a success.
Understanding the Benefits of a Cold Air Intake
Before we dive into the installation process, it’s essential to understand why a cold air intake is a valuable upgrade for your Chevy Camaro SS.
This might interest you : Elevate Your Tesla Model 3: Discover the Ultimate Sound System Upgrade Strategies!
Improved Engine Performance
A cold air intake system is designed to draw in cooler air from outside the engine compartment, as opposed to the warmer air that the stock intake system pulls from the engine bay. Cooler air is denser, which means it contains more oxygen. This increase in oxygen can lead to a significant boost in horsepower and torque.
Enhanced Throttle Response
By providing your engine with cooler, denser air, a cold air intake can also improve your car’s throttle response. This makes your Camaro feel more dynamic and responsive, especially during acceleration.
Also to read : Essential Guide: Safely Extracting a Broken Bolt from Your Engine Block
Better Fuel Efficiency
While the primary goal of a cold air intake is to increase performance, it can also lead to better fuel efficiency. By optimizing the air-fuel mixture, your engine can run more efficiently, which may result in slightly improved gas mileage.
Choosing the Right Cold Air Intake
With numerous options available on the market, selecting the right cold air intake for your Chevy Camaro SS can be overwhelming. Here are a few key factors to consider:
Brand and Quality
Look for reputable brands known for their quality and performance. Brands like JLT and Spectre Performance are popular among Camaro enthusiasts for their reliable and high-performance cold air intakes[2][3].
Filter Type
Decide between an oiled filter and a dry filter. Oiled filters, such as those offered by JLT, provide excellent filtration but require periodic cleaning and re-oiling. Dry filters are easier to maintain but may not filter as effectively[2].
Installation Requirements
Check if the intake requires any additional tuning or modifications. Some cold air intakes may need a tune to optimize performance, while others are plug-and-play[2].
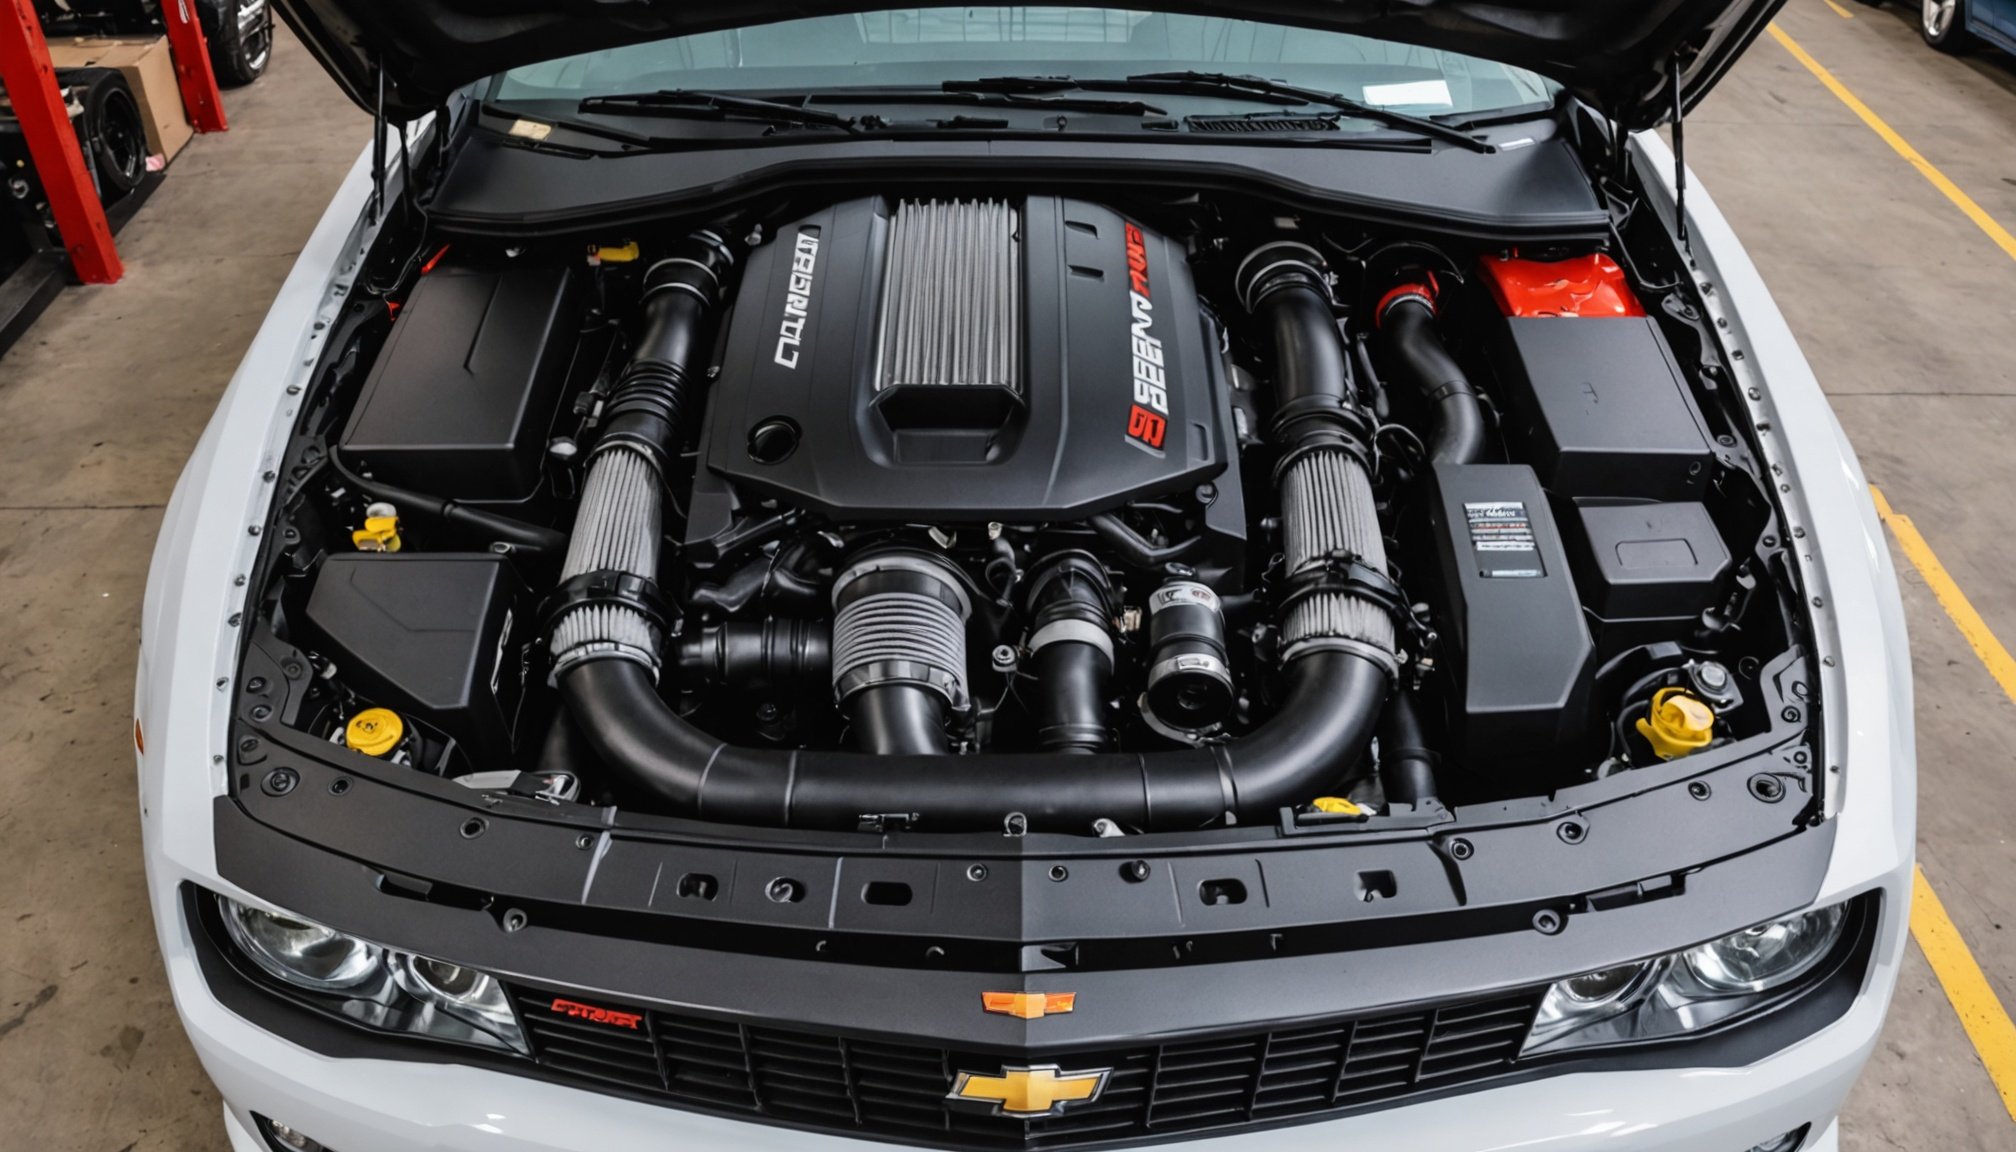
Step-by-Step Installation Guide
Installing a cold air intake is generally a straightforward process that can be completed in about an hour. Here’s a detailed guide to help you through it:
Preparation
- Gather Your Tools and Kit: Ensure you have all the components included in the intake kit, such as the intake tube, air filter, heat shield, and any necessary hardware.
- Consult the Manual: Read through the installation manual provided with the kit to understand the specific steps required for your particular intake.
Removing the Stock Intake
- Locate the Stock Intake: Identify the stock air intake system, which is usually located in the engine compartment.
- Disconnect the Mass Airflow Sensor: Carefully disconnect the mass airflow sensor from the stock intake tube.
- Remove the Stock Intake Tube: Use a screwdriver or wrench to remove the screws or clips holding the stock intake tube in place. Gently pull the tube away from the engine.
Installing the New Intake
- Install the Heat Shield: If your kit includes a heat shield, install it according to the manufacturer’s instructions. This helps to keep the intake air cool by blocking heat from the engine compartment.
- Mount the Air Filter: Attach the air filter to the end of the intake tube. Make sure it is securely fastened.
- Connect the Intake Tube: Place the new intake tube into position and secure it with the provided hardware. Ensure all connections are tight and secure.
- Reconnect the Mass Airflow Sensor: Connect the mass airflow sensor to the new intake tube, making sure it is securely attached.
Final Checks
- Check for Leaks: Inspect all connections to ensure there are no leaks.
- Test the System: Start your engine and listen for any unusual sounds or vibrations. Take your Camaro for a test drive to ensure everything is working smoothly.
Comparison of Popular Cold Air Intakes
Here is a comparison table of some popular cold air intakes for the Chevy Camaro SS:
| Brand | JLT | Spectre Performance | AFE |
|---|---|---|---|
| Filter Type | Oiled | Dry/Oiled | Dry/Oiled |
| Installation Time | 1 Hour | 1-2 Hours | 1-2 Hours |
| Tuning Requirements | Tune Required | Tune Optional | Tune Optional |
| Material | Plastic | High-Flow Tubing | High-Flow Tubing |
| Price | $319.00 | $300-$400 | $400-$500 |
| Fitment | 2016-2024 Camaro SS | 2016-2019 Camaro SS | 2016-2024 Camaro SS |
Practical Insights and Actionable Advice
Maintenance Tips
- Regularly Clean the Air Filter: Depending on the type of filter, you may need to clean and re-oil it periodically to maintain optimal performance.
- Check for Any Leaks: Regularly inspect the intake system for any signs of leaks or damage.
Combining with Other Upgrades
- Exhaust System: Pairing your cold air intake with a performance exhaust system can further enhance your car’s performance by reducing backpressure and allowing the engine to breathe more freely.
- Throttle Body and Intake Manifold: Upgrading the throttle body and intake manifold can also complement the cold air intake, providing even more significant performance gains.
Real-World Examples and Anecdotes
Many Camaro enthusiasts have seen significant improvements after installing a cold air intake. Here’s what one enthusiast had to say:
“Installing the JLT cold air intake on my 2018 Camaro SS was one of the best decisions I made. The throttle response is much better, and I can feel the extra power when I accelerate. It’s definitely worth the investment if you’re looking to boost your car’s performance,” – John D., Camaro Forum Member.
Installing a performance cold air intake is a great way to enhance your Chevy Camaro SS’s performance without breaking the bank. With the right tools, a bit of patience, and this comprehensive guide, you can transform your driving experience.
Key Takeaways
- Improved Performance: A cold air intake can significantly boost your car’s horsepower and torque.
- Easy Installation: The process is generally simple and can be completed in about an hour.
- Maintenance: Regularly clean and inspect the intake system to ensure optimal performance.
- Combining Upgrades: Pairing the cold air intake with other performance upgrades can lead to even greater gains.
By following this guide and choosing the right cold air intake for your Chevy Camaro SS, you’ll be able to enjoy a more dynamic and responsive driving experience. So, join the ranks of Camaro enthusiasts who have already discovered the benefits of a performance cold air intake and take your car to new performance heights.